To use our Relay service, you first need to complete the basic configuration. This documentation explains each step in detail.
Step 1: Create Your Account
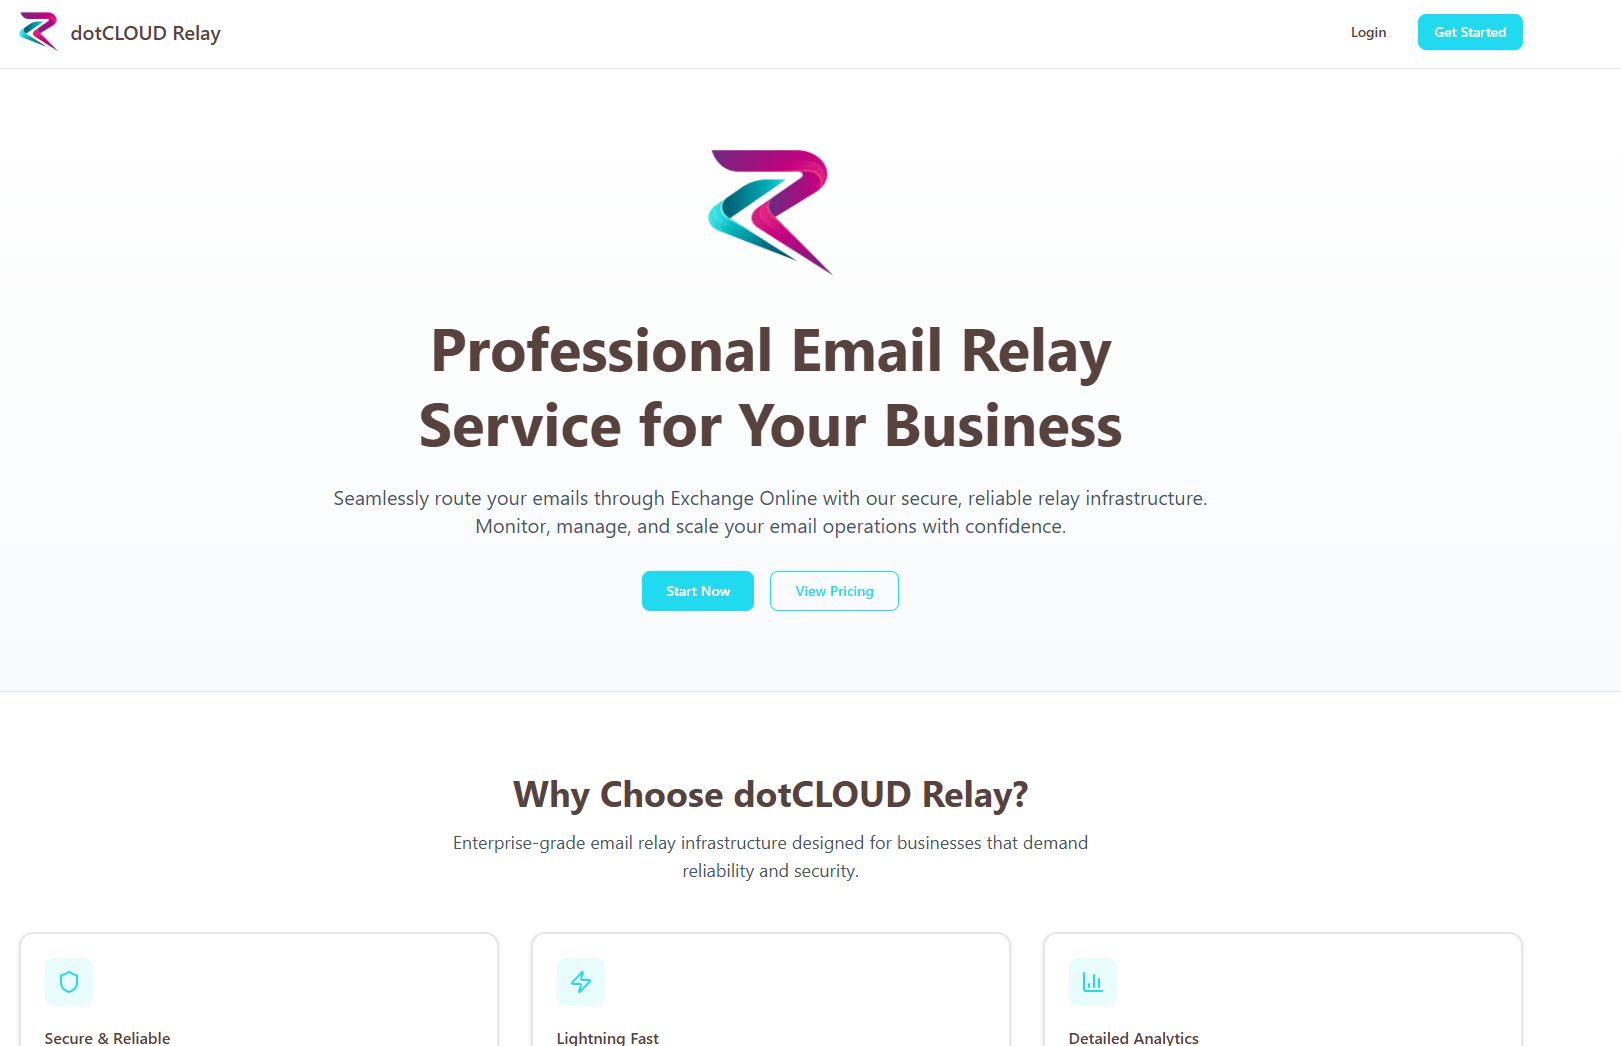
First, go to our SaaS page: https://relay.dotcloud.red and create an account under "Get Started". This account is for managing all your Relay accounts.
Step 2: Provide Registration Information
When creating your account, you'll be asked for relevant information including:
Your personal/company information
A pre-configured account on Exchange Online (required for identification and authentication)
You must also provide Exchange Server information, which is normally: smtp.office365.com
For detailed instructions on how to prepare the Exchange Online account, visit our website: https://docs.dotcloud.pro

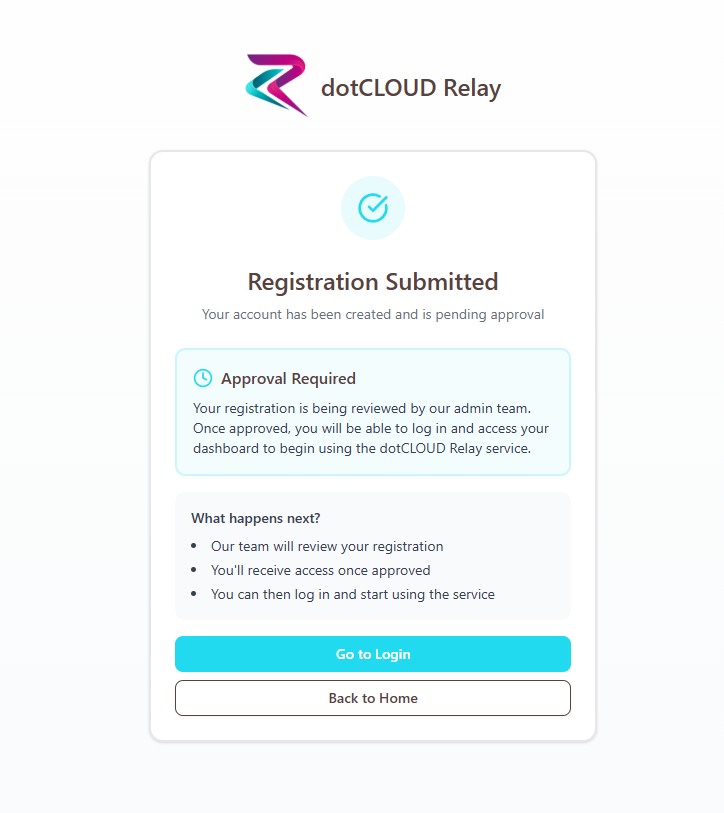
Step 3: Registration Submitted
Once your registration is successfully completed, you'll receive a message confirming that your request has been submitted.
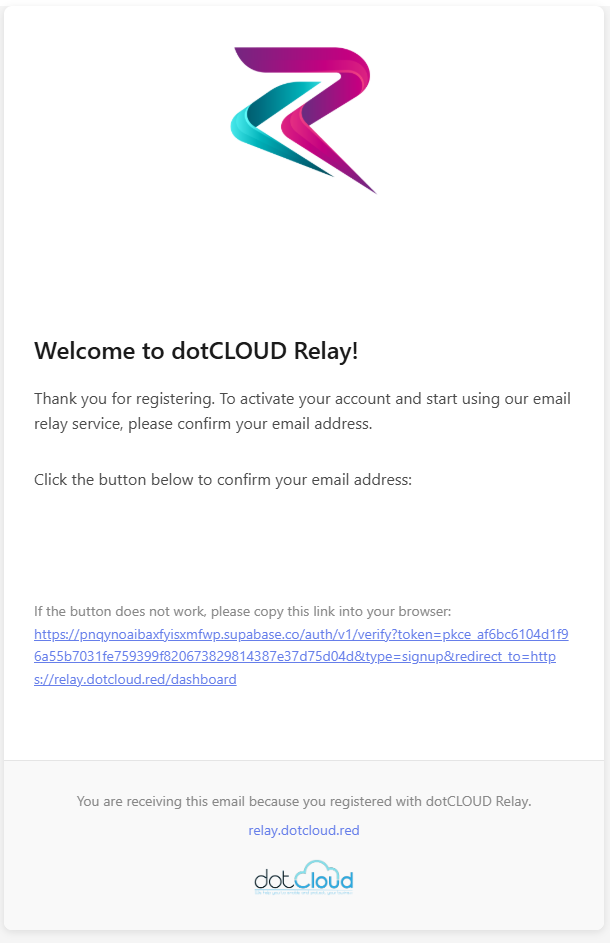
Step 4: Verify Your Email
Check the mailbox you provided during registration. You should receive an email to verify your account. If you don't find the message, please check your SPAM folder.
Step 5: Account Activation
We also need to activate your account on our side. Once both verifications are complete, you can log in to our portal with your credentials.
After logging in, you'll see the following dashboard view:
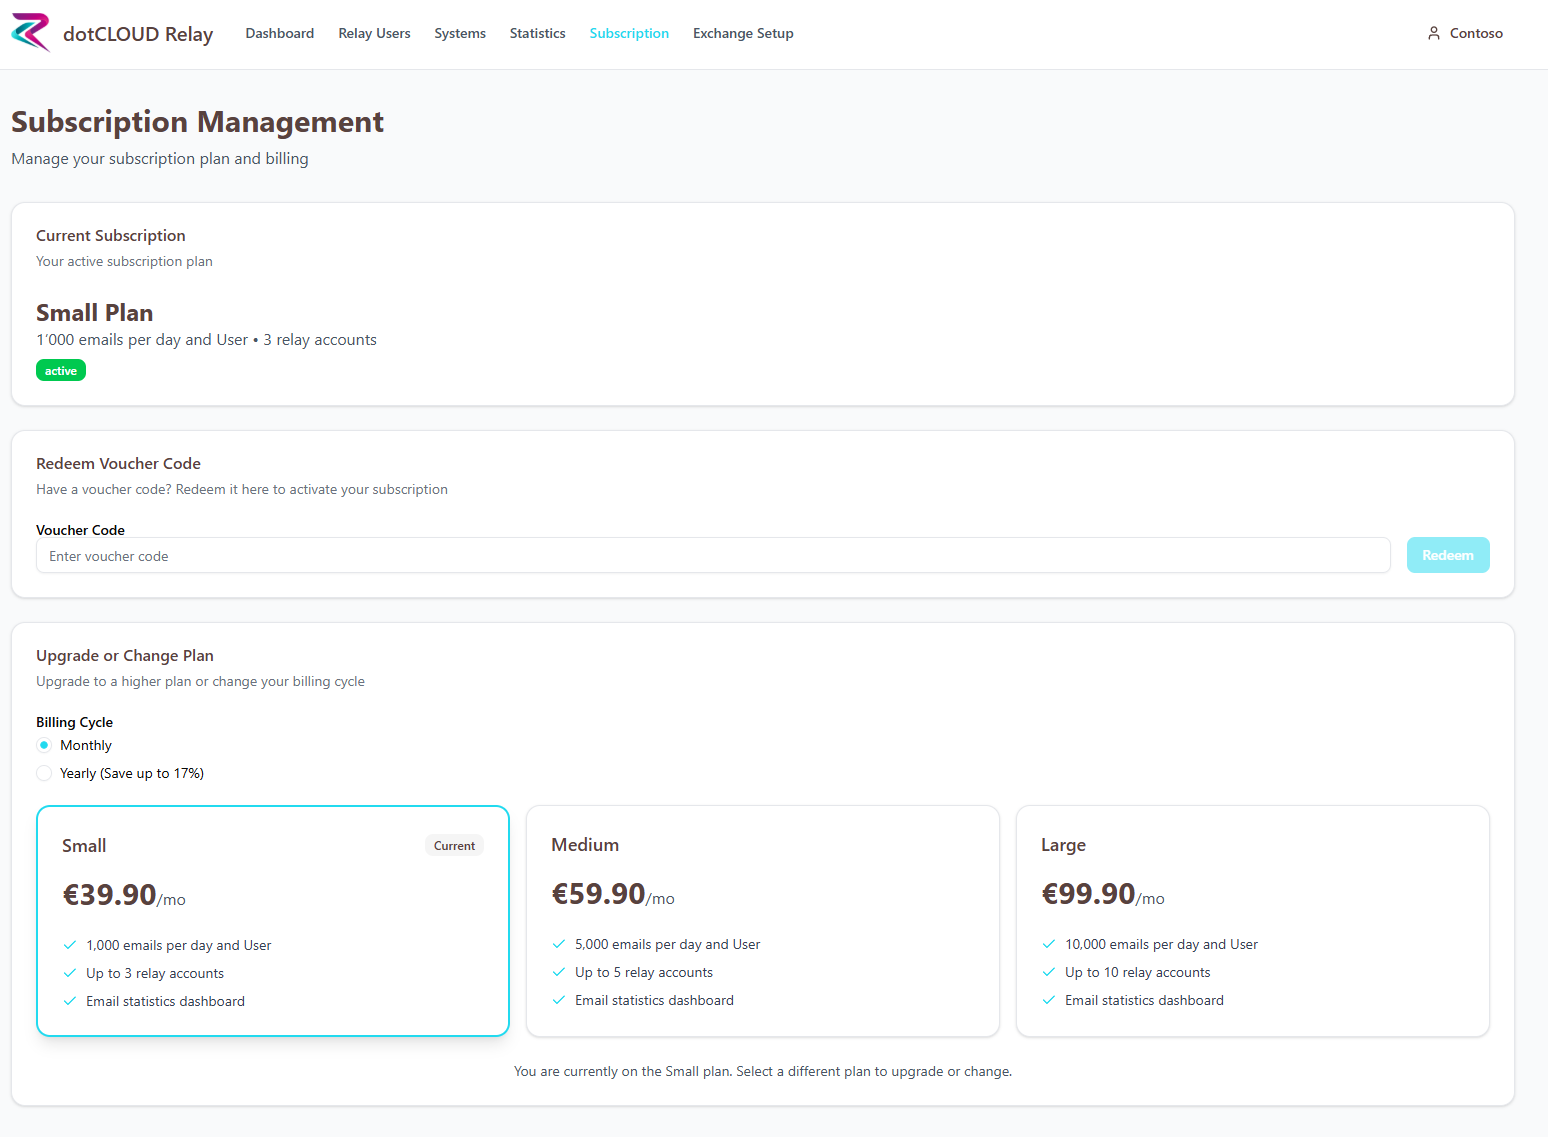
Here you need to select the subscription that's right for your company.
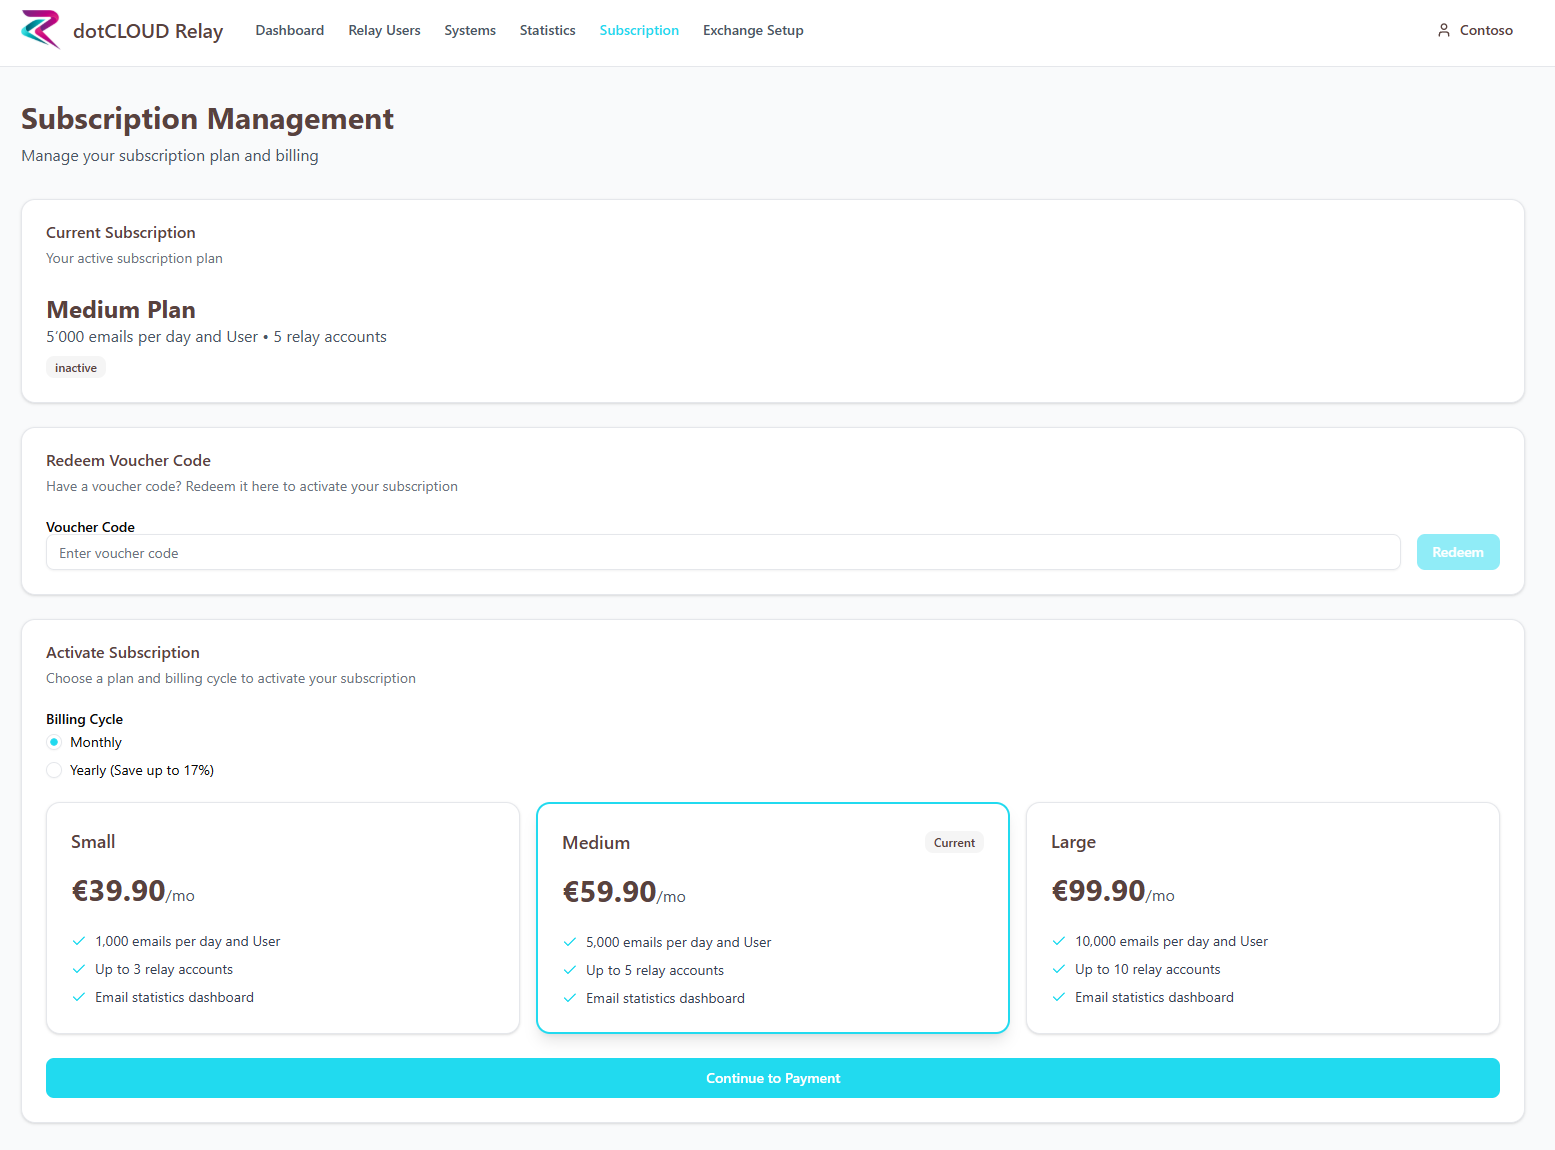
Step 6: Active Subscription
Once your subscription is booked, you'll see in the Subscription Management that your chosen plan is active.
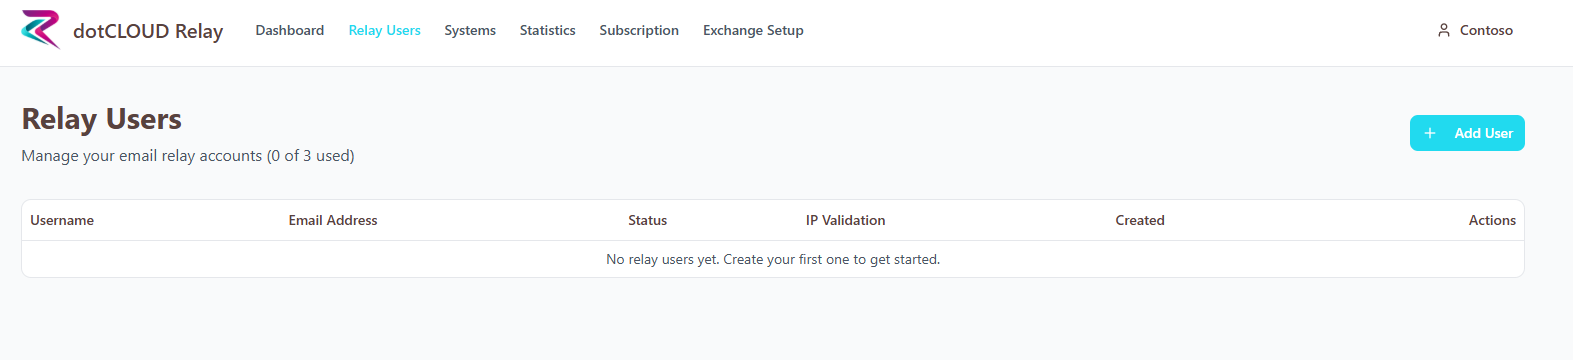
Step 7: Create Relay User
Now you need to create a Relay User. Depending on your chosen plan, you can create a maximum of 3, 5, or 10 Relay Users.
Go to Relay Users and then click Add User.
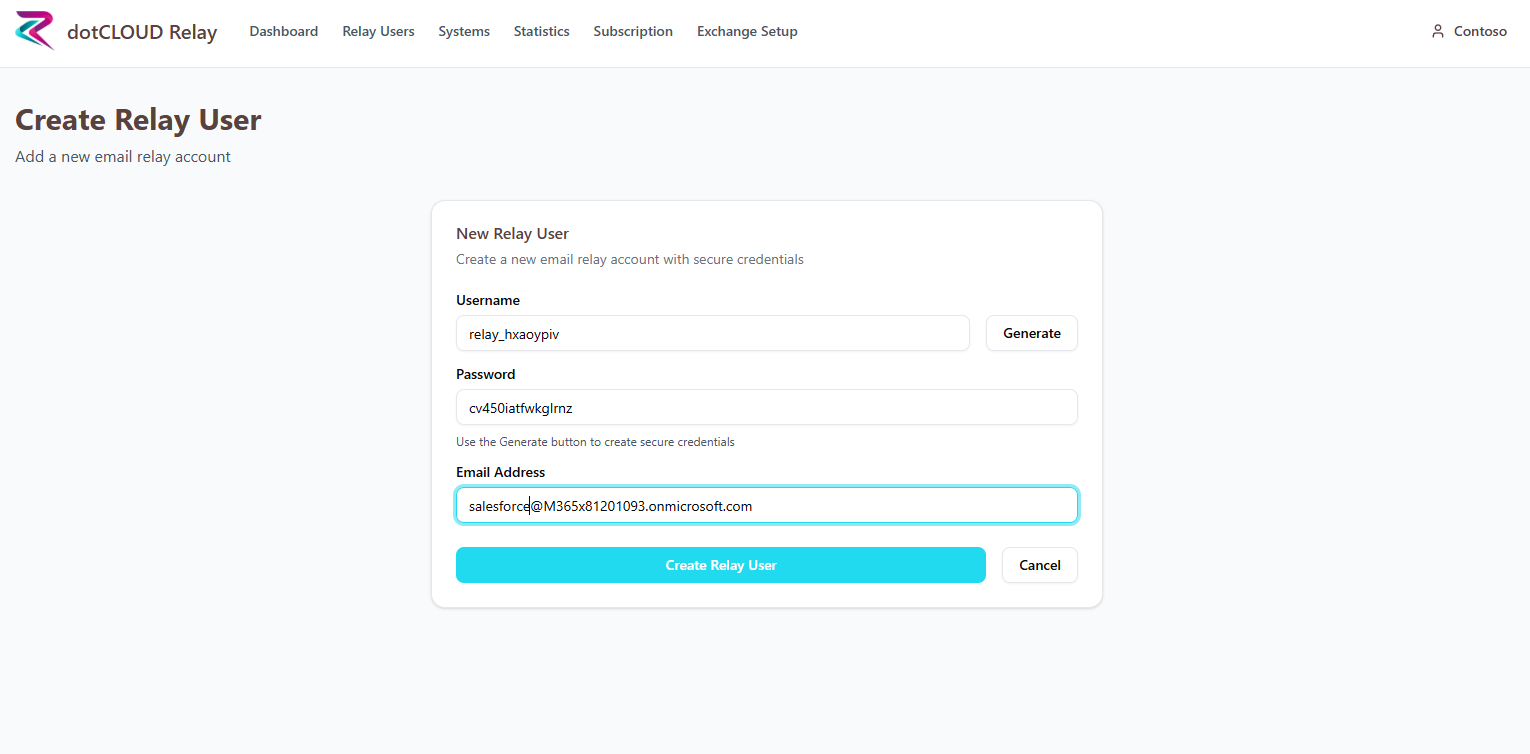
Step 8: Configure User Details
When creating the user, you can define the username and password yourself or have them automatically generated. It's also important to define an email address that this user should use as the sender.
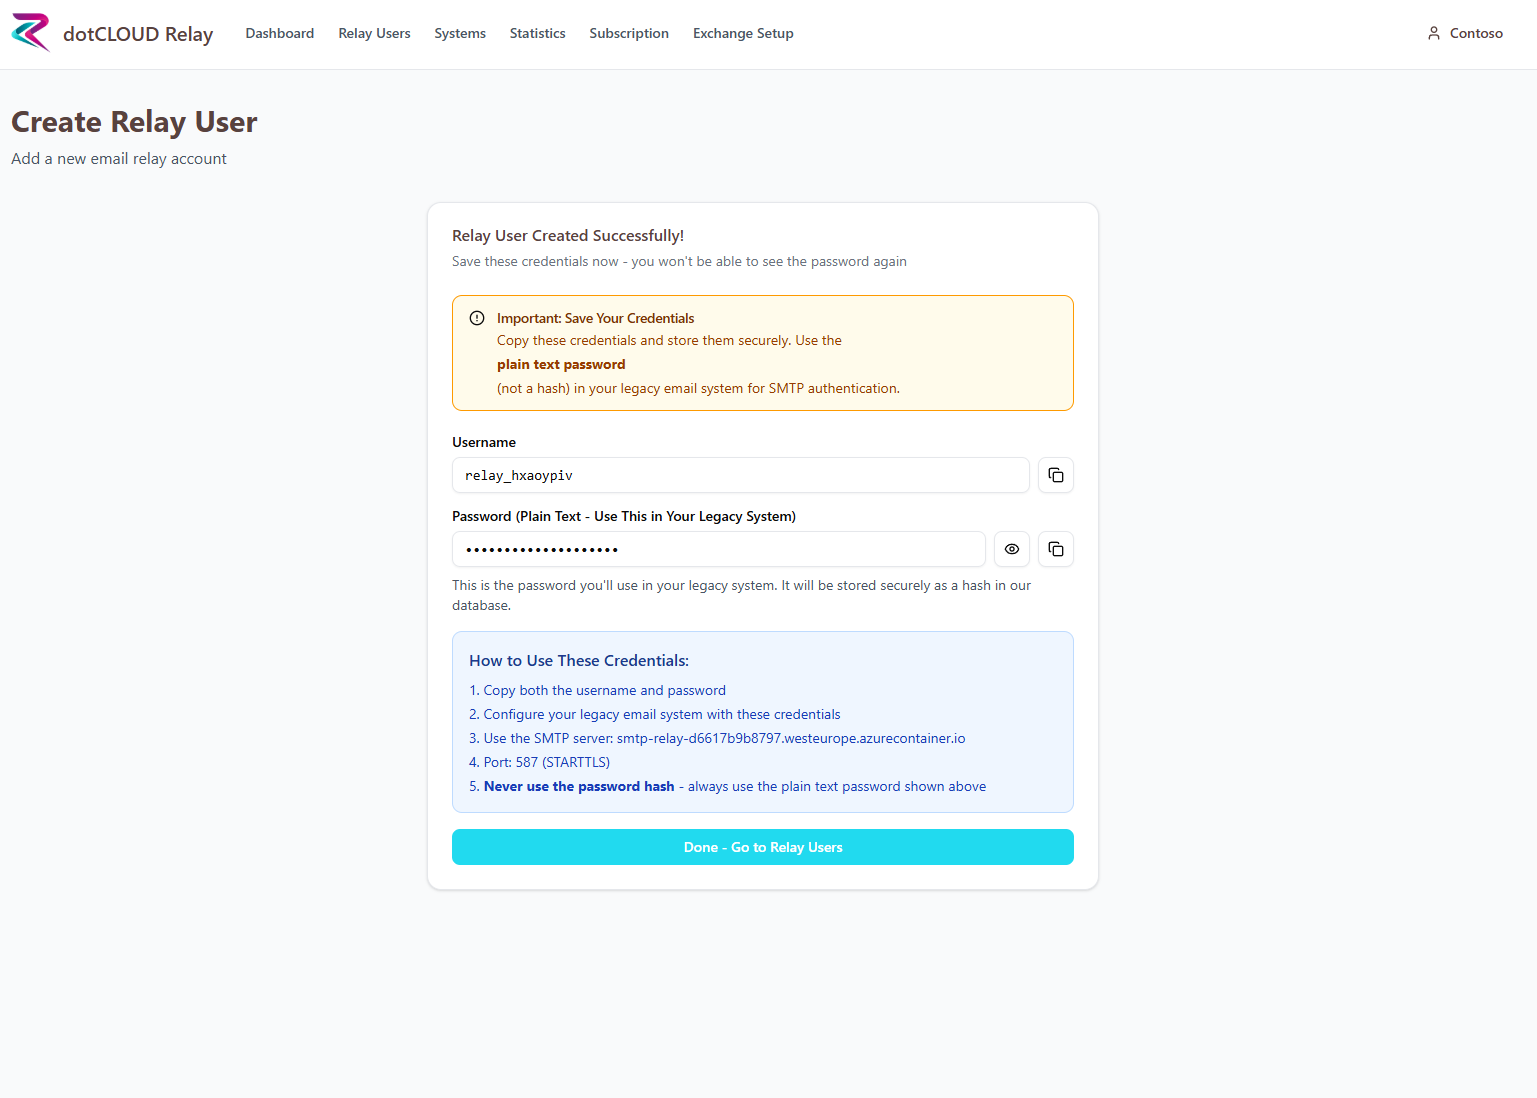
Step 9: Save Password
The summary will be displayed again. Important: The password is shown here for the last time. Please note it down—if you lose it, a new one must be generated.
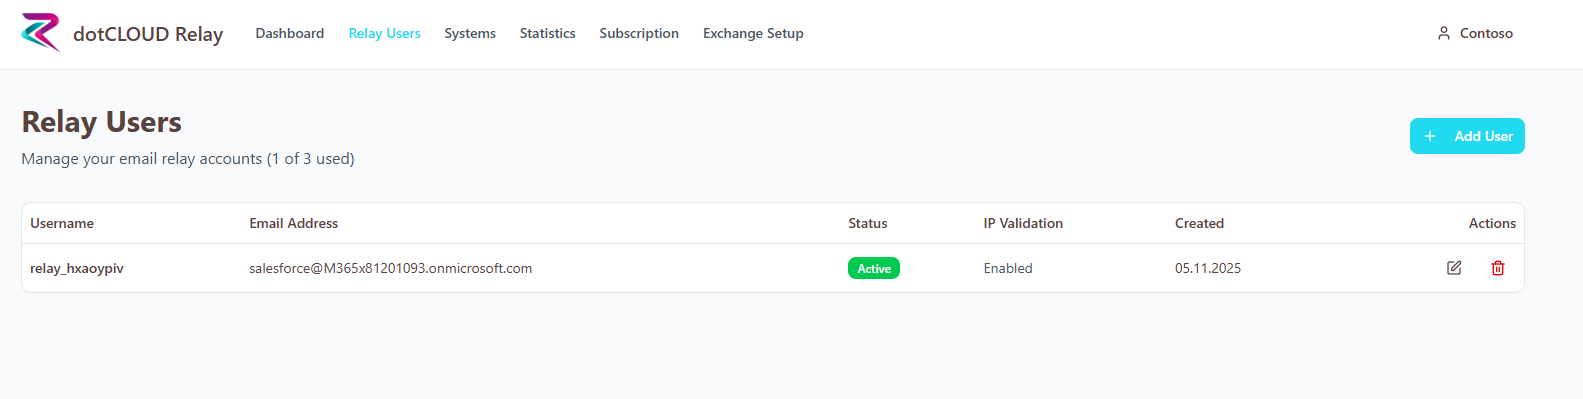
Step 10: Relay User Created
The created Relay User is now visible in the Relay Users Dashboard:
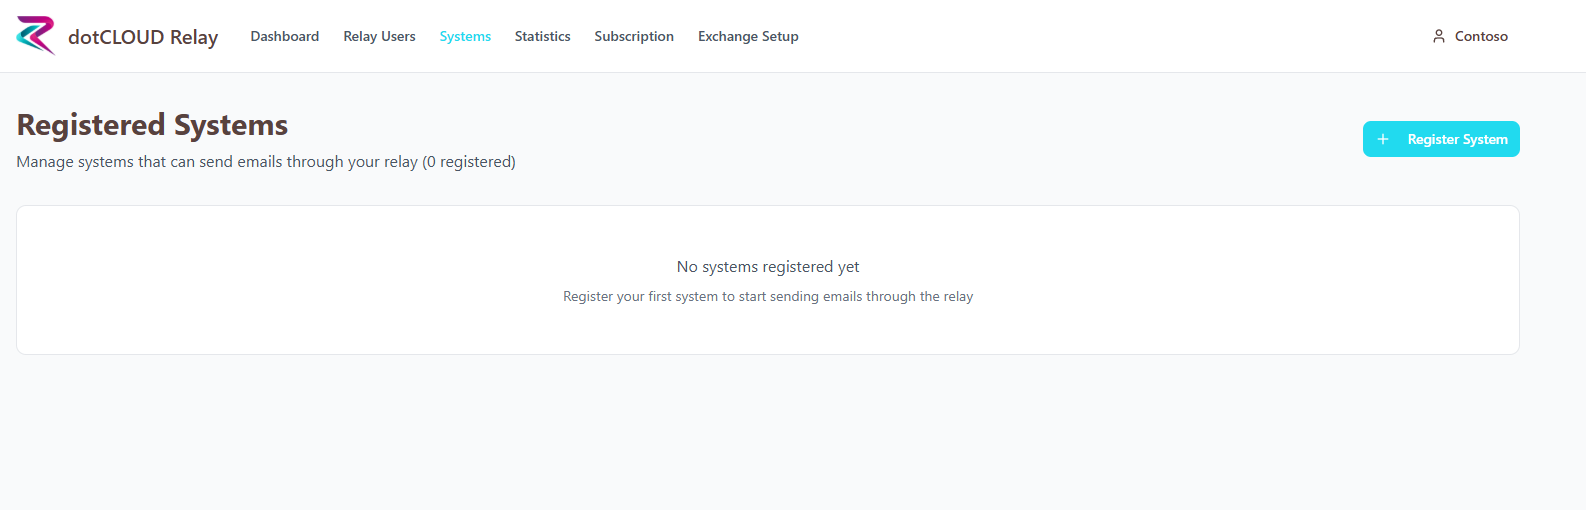
Step 11: Register Systems
In the next step, you need to register the systems that should use our Relay service.
Go to Systems on the dashboard and click Register System.
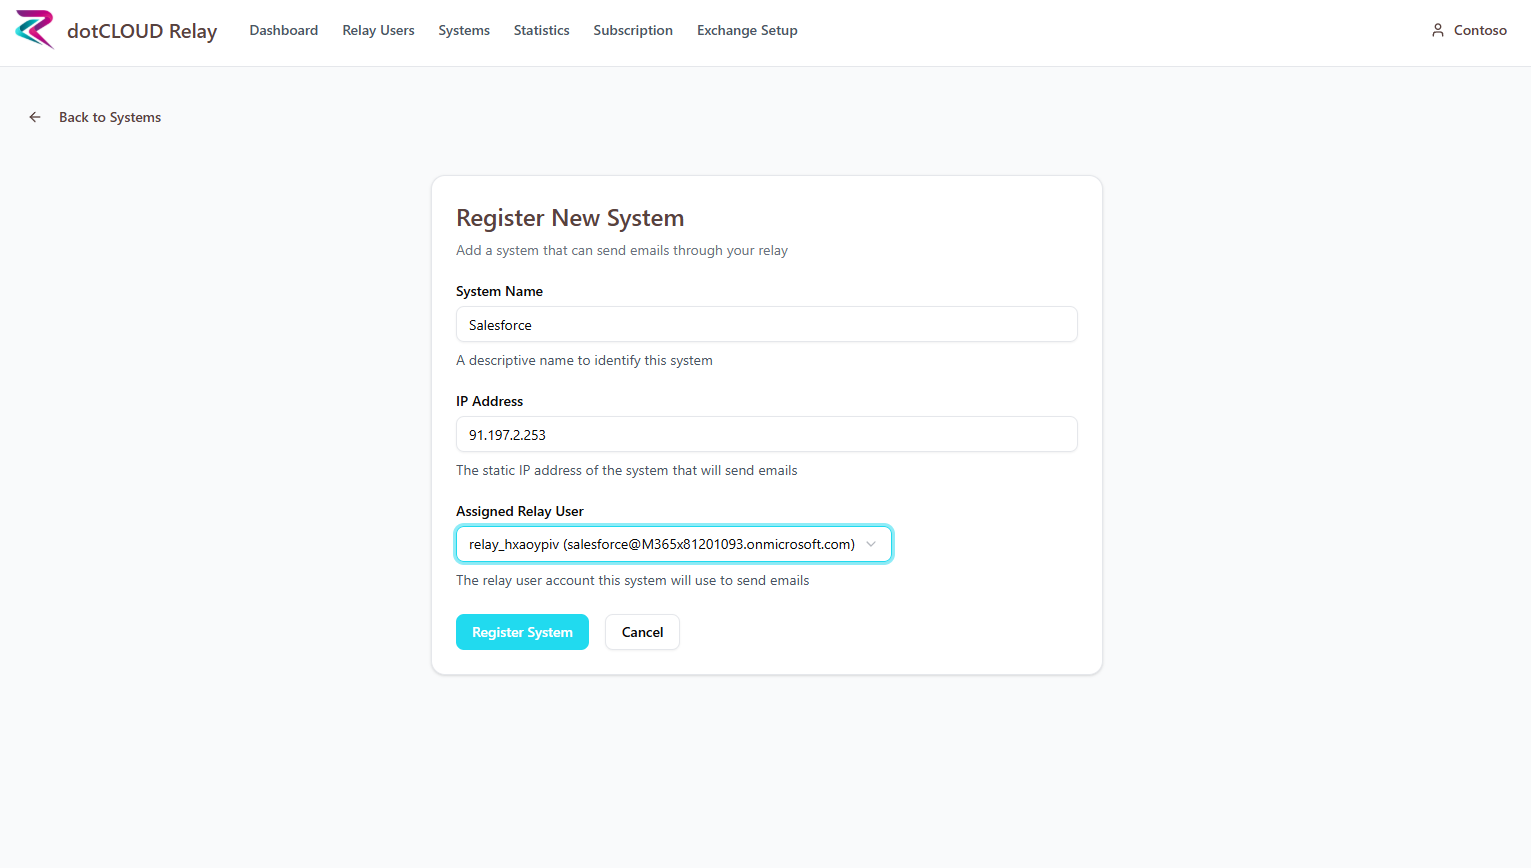
Step 12: System Configuration
Here you define:
The name of the system that should send emails via our SaaS
The public IP of the system
Select one of the previously created Relay Users from the dropdown menu to be used for this system
Important: You must ensure that the system's IP address has permission to send emails over port 587 to our SaaS.
Important: Note that a Relay User can be used for multiple systems. What matters is the maximum send limit per Relay User according to your subscription.
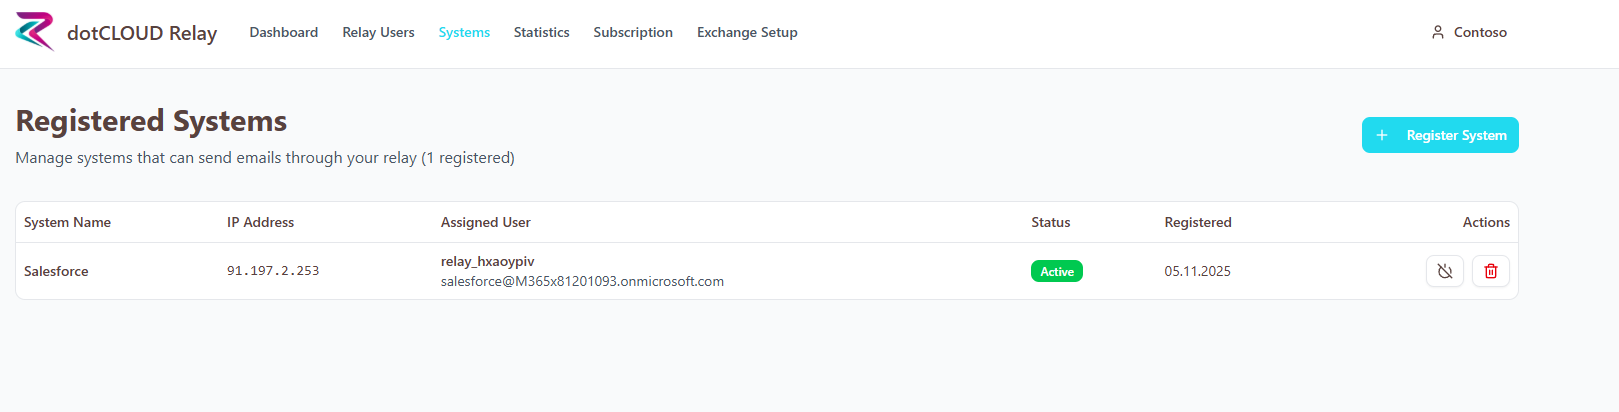
Step 13: System Registered
After the system has been registered, it's visible on the dashboard, including the IP address and assigned Relay User.
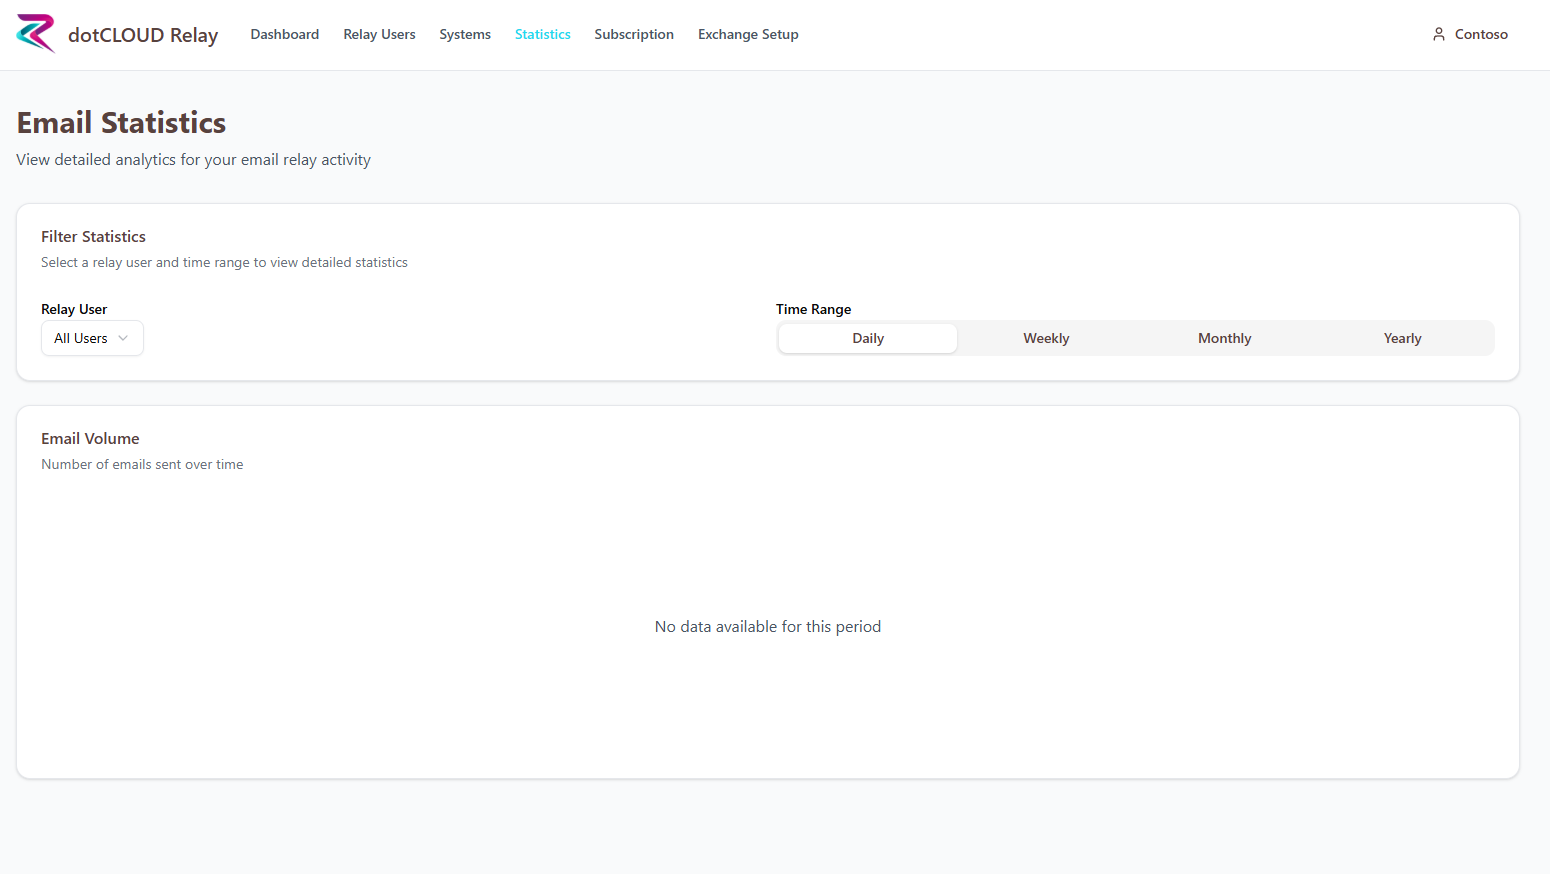
Step 14: Monitor Statistics
The system is now fully configured and ready to use. In the Statistics tab, you can always see an overview of the current status of sent emails.
Step 15: Additional Information
When you click on your user account in the top right corner of the browser, you can adjust your basic settings again under Settings.
At this location, you can modify and change your user data that you provided when creating your account. Additionally, our SaaS checks the new settings to ensure that the connection to Exchange Online continues to work with your adjusted data.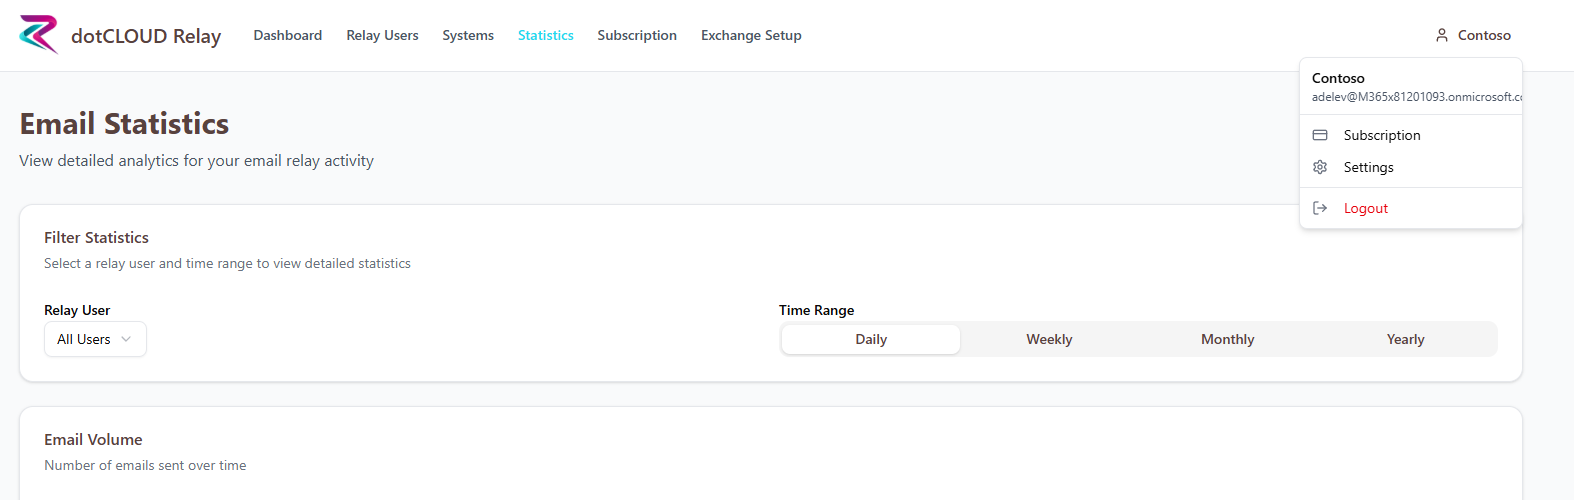
Further Resources
For more information about our solution, visit our documentation portal: https://docs.dotcloud.pro